 843 655 3181
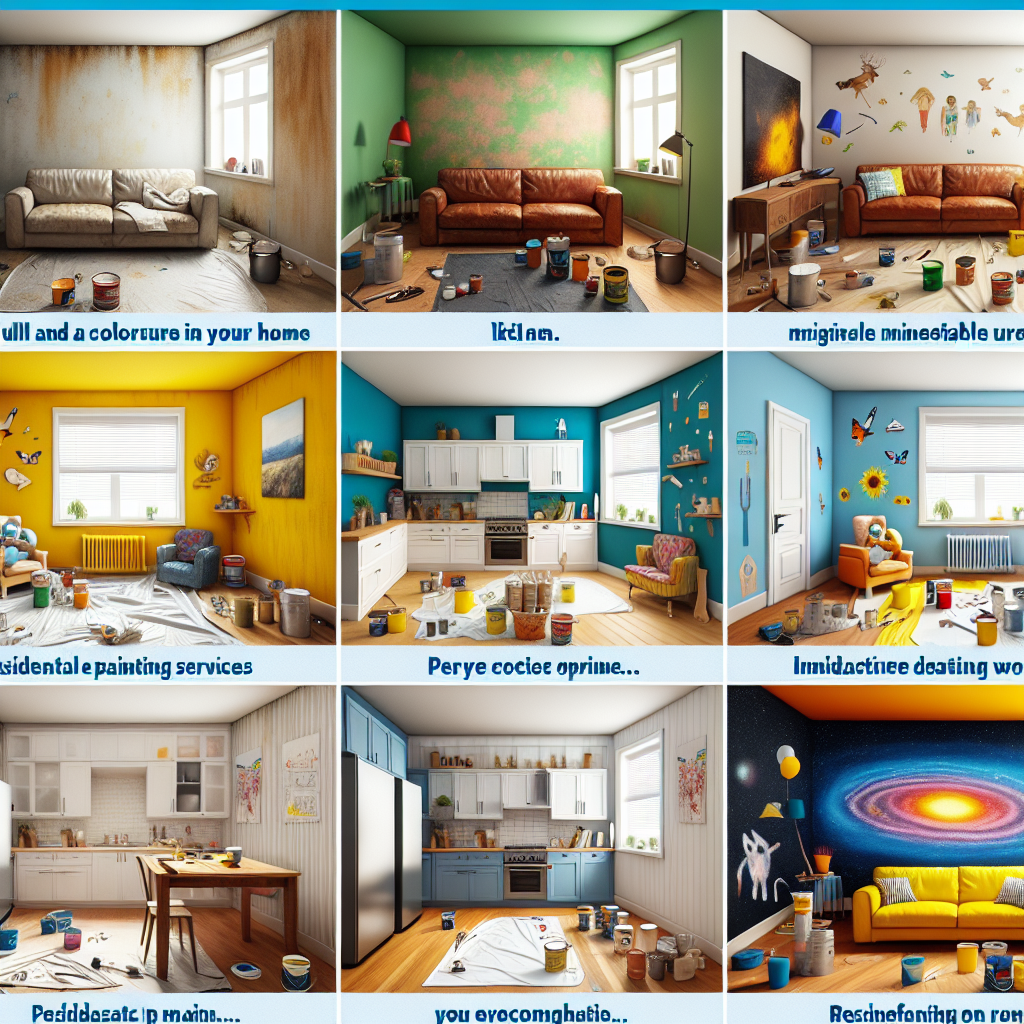
Residential Painting Services for Every Room in Your Home
Assessing the Unique Needs of Each Room
Did you know that the average person spends about 90% of their life indoors? That’s a lot of time surrounded by walls that could either inspire creativity or suck the energy right out of you. When it comes to painting residential spaces, understanding the unique needs of each room is crucial for creating an environment that feels just right.
Living Rooms: The Social Hub
The living room is where gatherings happen, Netflix binges unfold, and that awkward silence after a bad joke lingers. It’s essential to choose colors that foster warmth and conversation. Think soft neutrals or inviting earth tones. But don’t forget about lighting! A color that looks fabulous in natural light might feel cold under fluorescent bulbs.
Kitchens: The Heart of the Home
Kitchens are all about functionality—but they can also be fun! Bright colors can energize this space, but consider durability too. High-gloss finishes are great for reflecting light and are easier to clean after those epic cooking disasters. If you’re going for a trendy look, pastel shades paired with white cabinetry can create a fresh vibe.
Bedrooms: Your Personal Sanctuary
Serenity now! should be your mantra when choosing bedroom colors. Soft blues, greens, or even muted purples can promote relaxation and better sleep quality. And let’s not forget about accent walls—these can add personality without overwhelming your sanctuary.
Functional Spaces: Bathrooms and Home Offices
Functional spaces like bathrooms and home offices often get neglected in the paint department. But here’s a little secret: these rooms deserve just as much love! Light colors can make smaller bathrooms feel more expansive, while vibrant hues in a home office can spark creativity during those long work-from-home days.
Each room tells its own story—choose colors that reflect its purpose!
Ultimately, assessing the unique needs of each room goes beyond just slapping on a coat of paint. It involves understanding how you interact with these spaces daily and how color influences your mood and productivity. So before you start picking up brushes or calling in professionals, take a moment to visualize what you want each room to convey. Are you ready to turn your living space into something spectacular?
Choosing the Right Paint Types for Various Surfaces
Choosing the right paint type is like picking the perfect outfit for a first date—you want to impress, but you also need to be practical. Imagine slapping a glossy finish on your bathroom walls; it might look fabulous until the humidity turns it into a peeling disaster. Don’t let that happen to you!
Understanding Surface Materials
Different surfaces require different paint types, and knowing what each material needs can save you time and money. For instance, drywall craves a flat or eggshell finish that hides imperfections like a good concealer, while wood surfaces often benefit from semi-gloss or gloss finishes that highlight their natural beauty and withstand wear.
- Drywall: Flat or eggshell finish for hiding imperfections.
- Wood: Semi-gloss or gloss for durability and aesthetics.
- Metal: Use rust-inhibiting primer followed by an enamel finish.
- Concrete: Opt for masonry paint designed to withstand moisture.
The Role of Finish
Finish isn’t just a term used in woodworking; it’s crucial in painting residential spaces too. The finish affects not only the look but also the functionality of your paint job. A high-gloss finish is like wearing shiny shoes—it looks sharp but shows every scuff and blemish. On the other hand, a matte finish can hide imperfections but may not stand up well against scrubbing.
- Flat: Best for ceilings and low-traffic areas.
- Eggshell: Great for living rooms and bedrooms.
- Satin: Ideal for kitchens and bathrooms due to its washability.
- Semi-gloss: Perfect for trim, moldings, and high-traffic areas.
Choose wisely—your walls will thank you!
Environmental Factors Matter
Consider where you're painting too! Exterior surfaces face different challenges than interiors. Sun exposure can fade colors quickly, while moisture can wreak havoc on unprotected surfaces. Using weather-resistant formulas can help ensure your outdoor spaces stay vibrant longer.
So next time you're gearing up to transform your space with fresh colors, remember this golden rule: matching paint types to surfaces is essential not just for aesthetics but also for longevity. Think about how each room functions and choose accordingly!
Color Psychology: Selecting Hues that Enhance Room Atmosphere
Ever walked into a room and felt instantly at ease or, conversely, a little on edge? That’s color psychology at work! The hues you choose for your home can influence mood, energy levels, and even productivity. In fact, studies show that certain colors can increase focus by up to 20% in workspaces. So if your home office is painted a drab beige, it might be time for a makeover.
The Impact of Color on Emotions
Let’s break it down: colors evoke emotions. A bright yellow can spark joy and creativity—perfect for a child’s playroom or an art studio. On the flip side, deep blues promote calmness and serenity, making them ideal for bedrooms or meditation spaces. So when painting residential spaces, consider how you want to feel in each room.
- Red: Passionate and energetic; great for dining rooms.
- Green: Refreshing and revitalizing; perfect for living areas.
- Blue: Calm and peaceful; ideal for bedrooms.
- Yellow: Cheerful and uplifting; excellent for kitchens or playrooms.
- Purple: Luxurious and creative; suitable for offices or reading nooks.
Using Color to Define Spaces
Color isn’t just about mood—it also helps define spaces within your home. For example, an open-concept living area can feel more cohesive with complementary colors that flow from one space to another. Imagine pairing a soft green in the kitchen with a warm beige in the living room—suddenly your home feels like one harmonious environment instead of disconnected rooms.
Pro tip: Use darker shades on walls that receive less natural light to create warmth and intimacy.
Trendy Color Combinations
What’s hot right now? you ask. Earthy tones mixed with pops of vibrant colors are trending hard this year. Think terracotta paired with teal accents or soft taupe combined with mustard yellow pillows. These combinations create depth without overwhelming the senses—perfect when painting residential interiors!
Techniques for Achieving Professional Finishes
Ever tried to paint a room only to end up with streaks, uneven coverage, and a lingering sense of regret? You’re not alone. A staggering 70% of DIY painters admit they wish they had called in the pros instead. But fear not! With a few insider techniques, you can achieve finishes that would make even the most seasoned professionals nod in approval.
Prep Like a Pro
Preparation is key. Think of it as the foundation for your masterpiece. Start by cleaning the surfaces to remove dust and grease—this is especially important in kitchens where splatters are common. Then, patch any holes or imperfections with spackle and sand them smooth. A smooth surface is like a blank canvas; it allows your paint to shine without distractions.
- Clean surfaces thoroughly.
- Patch holes and sand smooth.
- Use painter's tape for clean edges.
Choose the Right Tools
A chain is only as strong as its weakest link. The same goes for painting residential spaces—your tools matter! Invest in high-quality brushes and rollers that suit your paint type. For instance, use a roller with a thicker nap for textured surfaces and a fine brush for trim work. This attention to detail will elevate your finish from amateur to expert.
- Select high-quality brushes and rollers.
- Consider foam rollers for smooth finishes.
- Keep brushes clean between uses to avoid streaks.
Quality tools lead to quality results!
The Right Technique Makes All the Difference
Cutting in might sound like something you do at the gym, but it's actually an essential painting technique. Use a brush to create clean lines along edges before rolling out larger areas. This method not only saves time but also ensures you won’t accidentally paint over those carefully taped edges.
Sustainable Painting Options for Eco-Conscious Homeowners
Did you know that traditional paints can release harmful volatile organic compounds (VOCs) into your home, impacting air quality and your health? It’s true! But fear not, eco-conscious homeowners—there’s a whole world of sustainable painting options waiting to transform your space without compromising your values.
What Makes Paint Sustainable?
Sustainable paint is like the superhero of the painting world. These eco-friendly options are designed to minimize environmental impact while still providing that beautiful finish you crave. Look for paints labeled as low-VOC or zero-VOC. These terms indicate that the paint has significantly reduced levels of those nasty chemicals that can linger in the air long after you’ve finished painting.
Another key feature of sustainable paints is their use of natural ingredients. Many brands now offer paints made from plant-based materials, minerals, and even recycled content. This not only helps reduce waste but also supports a healthier indoor environment.
Eco-Friendly Paint Brands to Consider
- Benjamin Moore's Natura: A zero-VOC paint that offers excellent coverage and a wide range of colors.
- Sherwin-Williams' Harmony: This line features low-VOC formulations with added antimicrobial properties.
- Behr's Premium Plus: Known for its durability and low environmental impact, this paint comes in a variety of finishes.
Pro Tip: Always check for third-party certifications like Green Seal or EcoLogo when selecting eco-friendly paints!
The Benefits Beyond Aesthetics
Let’s be real—who doesn’t want a stunning home? But going green with your paint choices brings more than just good looks. These sustainable options often provide better durability and coverage compared to their conventional counterparts. Plus, they contribute to improved indoor air quality, which is especially beneficial if you have kids or pets roaming around.
Green Painting Techniques
Now that you’ve picked out your eco-friendly paint, let’s talk techniques! Using tools like high-quality brushes and rollers can help reduce waste by ensuring an even application with less product needed. And remember to prep surfaces well; this means cleaning them thoroughly before painting to avoid using extra coats.
Finally, consider how you dispose of leftover paint. Many local municipalities offer recycling programs specifically for hazardous materials like paint cans—so don’t just toss them in the trash! Being conscious about disposal practices is part of being an eco-friendly homeowner.
In conclusion, sustainable painting options are more than just a trend—they’re a commitment to creating healthier homes and environments. So the next time you're gearing up for a residential painting project, think green; it might just inspire you to create a space that's as kind to the planet as it is beautiful!
Planning Your Painting Project: Timeline and Budget Considerations
Picture this: you’re all set to transform your home with a fresh coat of paint, but suddenly, you’re hit with the realization that you’ve got no idea how long it’s going to take or how much it’s going to cost. Spoiler alert: this is where many DIYers trip up, leading to projects that drag on longer than a Monday morning meeting.
Creating a Realistic Timeline
First things first—let’s talk about your timeline. A well-planned schedule can be your best friend when painting residential spaces. Here’s a breakdown of what to consider:
- 1-2 Days for Preparation: This includes cleaning surfaces, moving furniture, and taping edges.
- 1-3 Days for Painting: Depending on the size of the room and number of coats needed, this can vary significantly.
- 1 Day for Drying Time: Most paints require at least 24 hours to dry before you can start moving furniture back in.
Pro Tip: Always account for unexpected delays—like that pesky patch job that takes longer than anticipated!
Budgeting for Your Project
Budget is one of those words that can cause instant panic. But fear not! With a little planning, you can tackle costs like a pro. Here’s how to break down your budget:
- Paint Costs: Factor in the type and quality of paint. Expect to spend anywhere from to per gallon depending on brand and finish.
- Supplies: Don’t forget brushes, rollers, painter's tape, drop cloths, and other essentials—this can add another -0.
- Labor: If you're hiring professionals (which we highly recommend for larger projects), get quotes from at least three different painters.
'Let’s say you’re painting a three-bedroom house. With an average cost of per gallon and needing about five gallons per room (considering two coats), plus supplies and labor, your project could easily reach upwards of ,000 or more. It may sound steep, but think about the long-term satisfaction you'll gain from a beautifully painted home.'
The Final Countdown
As you finalize your plans, take time to visualize the end result. What colors speak to you? How will they complement your existing decor? Planning isn’t just about logistics; it’s also about dreaming up the beautiful space you'll create. So gather those swatches and get ready—your perfect paint job awaits!
Picture this: you’re all set to transform your home with a fresh coat of paint, but suddenly, you’re hit with the realization that you’ve got no idea how long it’s going to take or how much it’s going to cost. Spoiler alert: this is where many DIYers trip up, leading to projects that drag on longer than a Monday morning meeting.
Creating a Realistic Timeline
First things first—let’s talk about your timeline. A well-planned schedule can be your best friend when painting residential spaces. Here’s a breakdown of what to consider:
- 1-2 Days for Preparation: This includes cleaning surfaces, moving furniture, and taping edges.
- 1-3 Days for Painting: Depending on the size of the room and number of coats needed, this can vary significantly.
- 1 Day for Drying Time: Most paints require at least 24 hours to dry before you can start moving furniture back in.
Pro Tip: Always account for unexpected delays—like that pesky patch job that takes longer than anticipated!
Budgeting for Your Project
Budget is one of those words that can cause instant panic. But fear not! With a little planning, you can tackle costs like a pro. Here’s how to break down your budget:
- Paint Costs: Factor in the type and quality of paint. Expect to spend anywhere from $20 to $60 per gallon depending on brand and finish.
- Supplies: Don’t forget brushes, rollers, painter's tape, drop cloths, and other essentials—this can add another $50-$150.
- Labor: If you're hiring professionals (which we highly recommend for larger projects), get quotes from at least three different painters.
'Let’s say you’re painting a three-bedroom house. With an average cost of $30 per gallon and needing about five gallons per room (considering two coats), plus supplies and labor, your project could easily reach upwards of $2,000 or more. It may sound steep, but think about the long-term satisfaction you'll gain from a beautifully painted home.'
The Final Countdown
As you finalize your plans, take time to visualize the end result. What colors speak to you? How will they complement your existing decor? Planning isn’t just about logistics; it’s also about dreaming up the beautiful space you'll create. So gather those swatches and get ready—your perfect paint job awaits!
Maintenance of Painted Surfaces: Ensuring Longevity
Imagine this: you’ve just finished a stunning residential painting project, and your walls look like they belong in a magazine. But fast forward six months, and those walls are looking a little worse for wear. Did you know that neglecting the maintenance of painted surfaces can reduce the lifespan of your paint job by up to 50%? That's right—just like your car needs regular oil changes, your walls need some TLC too!
Why Maintenance Matters
When it comes to painted surfaces, maintenance is not just about aesthetics; it’s about protecting your investment. A well-maintained paint job can withstand the test of time, while neglected surfaces can lead to peeling, fading, and even mold growth. Think of it as a protective shield—without regular upkeep, that shield weakens.
- Regular cleaning prevents dirt buildup and maintains color vibrancy.
- Promptly address any scratches or scuffs to avoid larger repairs later.
- Using touch-up paint can extend the life of your finish dramatically.
Cleaning Techniques for Painted Surfaces
Cleaning painted surfaces might sound simple, but there’s an art to it. Using the wrong products or methods can lead to damage faster than you can say oops! Start with a gentle approach: use a soft sponge or cloth with warm water and mild soap. For tougher stains, consider using a mix of vinegar and water—just be sure to test it first on an inconspicuous area.
Tip: Avoid harsh chemicals that can strip paint or cause discoloration.
Oops Moments: Repairing Damage
Accidents happen is practically the motto of any home! Whether it's a rogue piece of furniture scraping against the wall or an enthusiastic child with crayons, damage is inevitable. The key is to act fast. For minor scratches, a simple touch-up with leftover paint will do the trick. If you’re dealing with larger areas of wear or peeling, you'll want to sand down the affected area before repainting for a smooth finish.
The Right Time for Maintenance
So when should you schedule these maintenance checks? A good rule of thumb is every six months for high-traffic areas like hallways and living rooms where wear is more noticeable. For less-used spaces such as guest rooms or dining rooms, an annual check should suffice. Keep in mind seasonal changes; humidity can affect both interior and exterior paints differently.
In conclusion, maintaining your painted surfaces isn’t just about keeping them pretty; it’s about ensuring they last long enough to keep up with your busy life. So grab that sponge and get ready to show those walls some love! Your future self will thank you when those walls continue looking fresh years down the line.
Collaborating with Professional Painters: What to Expect
When you decide to paint your home, it’s like inviting a team of skilled artists into your personal gallery. But here’s the catch: not all artists work the same way. Collaborating with professional painters can feel like a dance—sometimes graceful, sometimes clumsy—but ultimately, it should lead to a masterpiece.
The Initial Consultation
Expect the first meeting to be more than just small talk about paint colors. A good painter will want to understand your vision, preferences, and even your lifestyle. Are you a family with kids and pets? Do you have a penchant for vibrant hues or prefer muted tones? They’ll ask questions that dig deeper than surface-level aesthetics.
- Discuss your preferred color palette and finish types.
- Evaluate the condition of existing surfaces.
- Talk about timelines and availability.
- Set a budget that works for both parties.
The Proposal Phase
Here’s what I can do for you—this is where the rubber meets the road. After assessing your needs, professional painters should provide you with a detailed proposal. This isn’t just a price tag; it’s a roadmap of what to expect from start to finish.
A good proposal outlines materials, labor costs, and estimated timelines.
But wait! You might be thinking, What if I don’t understand all this technical jargon? Don’t hesitate to ask questions! A professional painter should be willing to break down complex terms into layman’s language because communication is key in this collaboration.
On-Site Preparation
Prepping the canvas is critical in painting residential spaces. Expect your painters to take time ensuring everything is ready before they even open a can of paint. This includes moving furniture out of the way, covering floors with drop cloths, and taping off edges for clean lines.